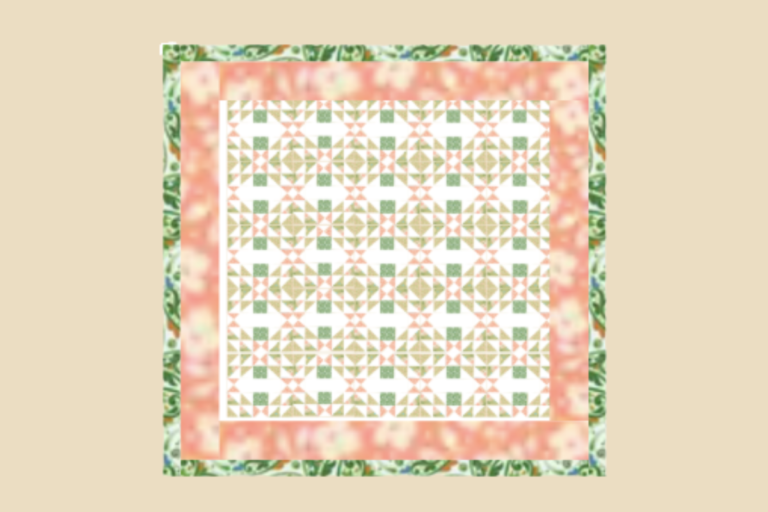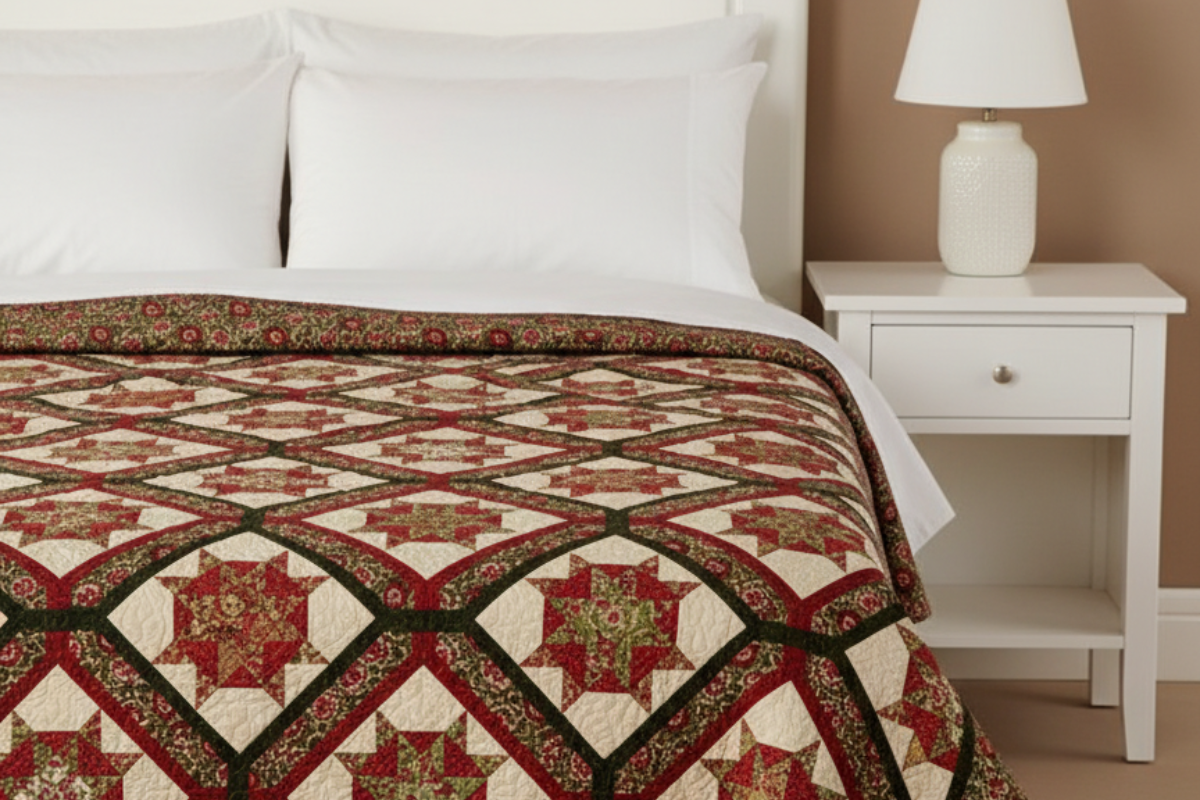
Full Size Quilt Pattern
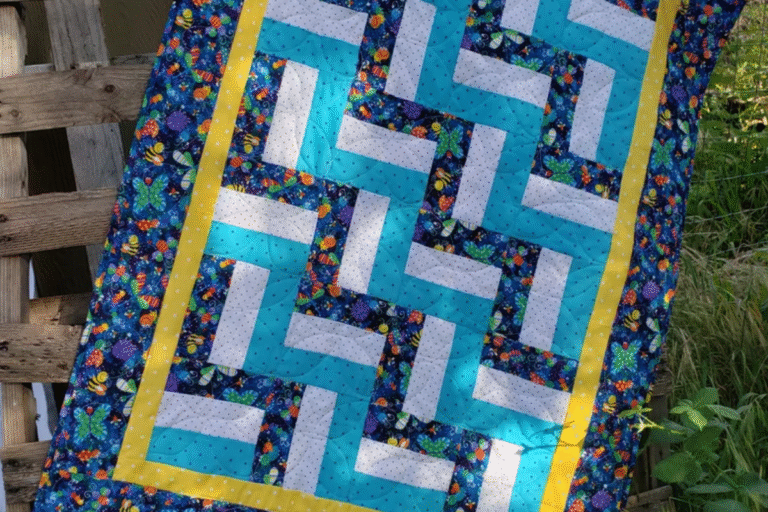
This full size quilt pattern is a vintage quilt pattern that is much easier than it may look. Such a great quilt pattern to make for yourself or to make as a gift.
Fabric Giveaway
Each month I give away fabric. You simply answer the question I ask in email to be entered
Table of Contents
Free Quilt App
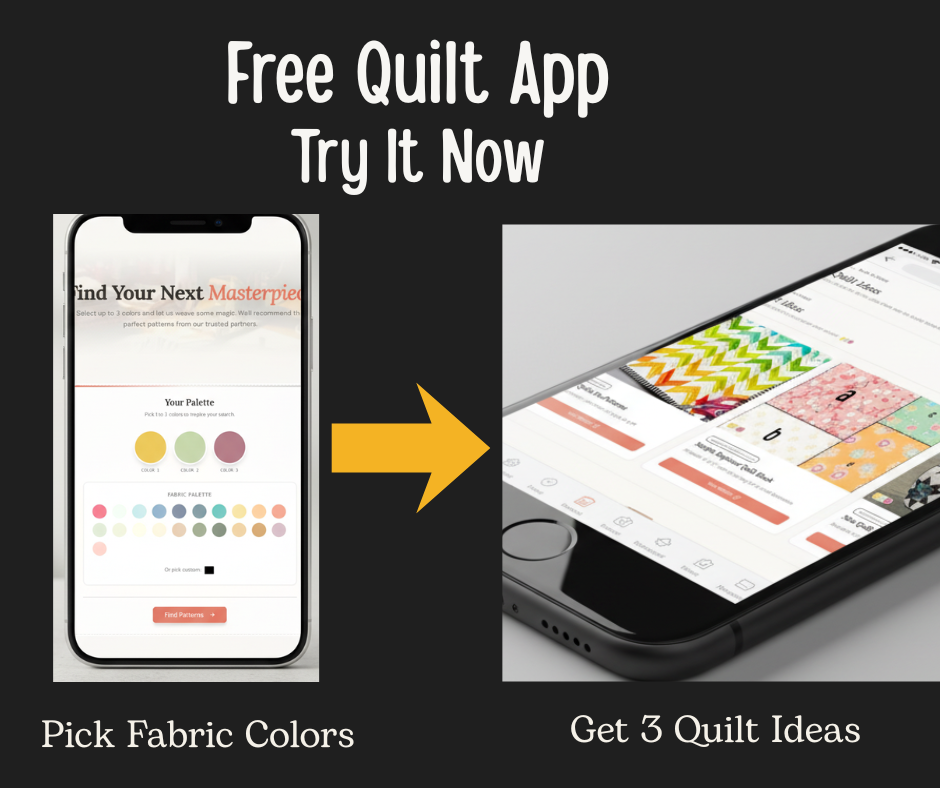
You can stop scrolling trying to find the perfect quilt pattern for the fabric you have on hand. Simply pick up to 3 fabrics and you will receive 3 quilt ideas
Fabrics Needed for Full Size Quilt Pattern

Finished Quilt size is 77 1/2 x 100 1/2″
- 18- 9″x22″ fabrics of assorted red and green prints for blocks
- 2 yards of cream print fabric for blocks
- 1 1/2 yards of dark red print fabric for blocks
- 1 1/4 yards of solid red for sashing
- 1 1/2 yards of solid green for sashing and inner border
- 4 1/2 yards of red floral for sashing, setting triangles, outer border and binding for your full size quilt pattern.
- 6 yards of backing fabric
- 84″ x 106″ quilt batting
Cutting Your Fabric
To get the most out of your Fabrics, cut your pieces in the order that I put them below.
From each assorted red and green print, cut:
- 1- 4 1/2″ square
- 16- 2 1/2″ squares
From cream fabric, cut:
- 72- 4 1/2″ square
- 72- 2 1/2 x 4 1/2″ rectangles
From dark red fabric, cut
- 72- 2 1/2 x 4 1/2″ rectangles
- 72- 2 1/2″ square
From solid red fabric, cut
- 16- 1 1/2 x 42″ strips for sashing
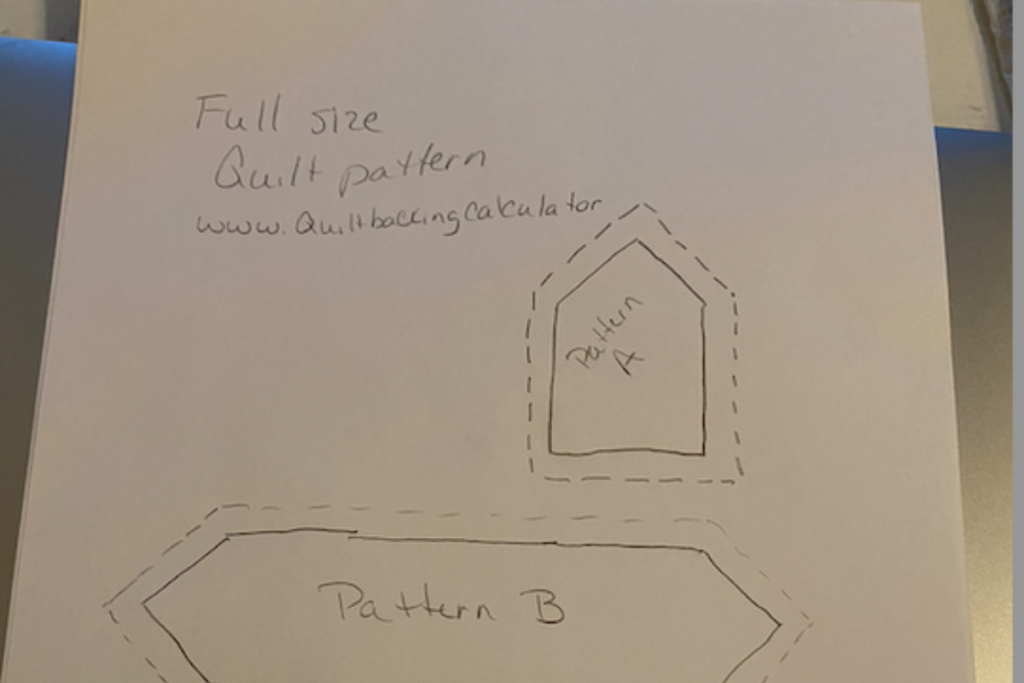
- 30 of Pattern A
- 9 of Pattern B
From solid green fabric cut
From Red floral fabric cut
- 9- 5 x 42″ strips for outer border
- 25- 2 1/2 x 42″ strips for sashing and binding
- 3- 18 1/4″ Squares, cutting each diagonally twice in an X for a total of 12 triangles (you’ll have two leftover triangles)
- 2- 9 3/8″ Squares, cutting each and half diagonally for a total of four corner triangles
- 240- 3 1/4″ Squares, cutting each diagonally twice in an X for a total of 96 sashing triangles
Assemble your quilt blocks
Here’s how you will make one Quilt Block. You will need a total of 18 blocks for this full size quilt pattern
For each Quilt Block, use the same cream Fabric and dark red fabric. Select 16 2 1/2″ squares from one red or green fabric for the star points in each block. Also choose a 4 1/2″ square in the same color but a different print for the center.
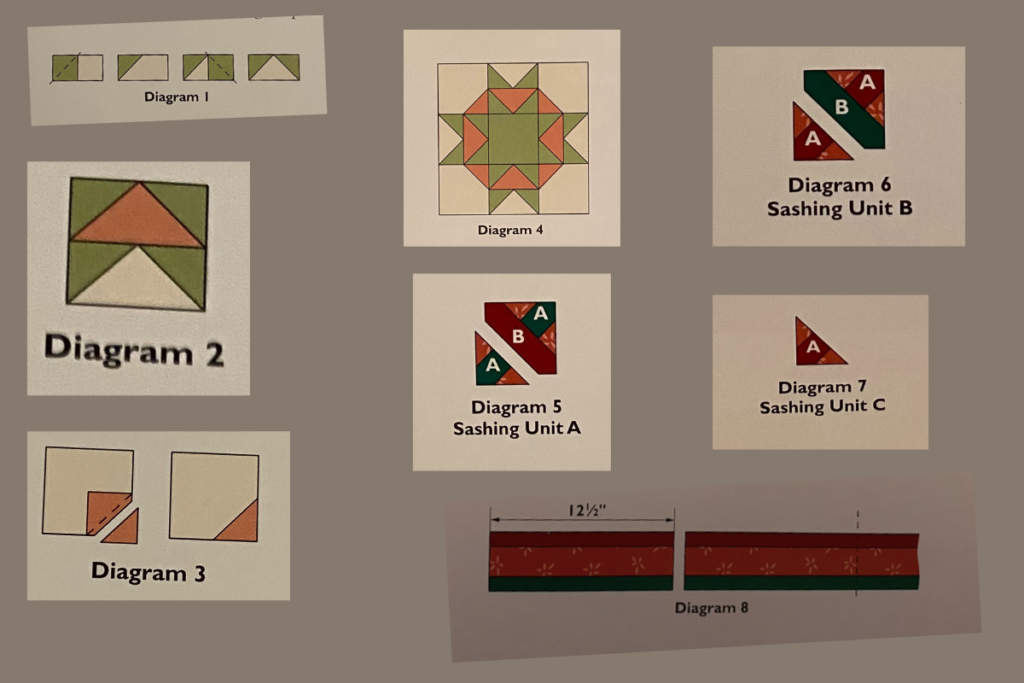
- For accurate sewing lines, use a fabric marker to mark a diagonal line on the wrong side of 16- 2 1/2-in squares from the same red or green print fabric and four dark red print 2 1/2″ square fabric. If you struggle with your fabric stretching as you draw the lines, Place 220 grit sandpaper under your squares.
- Align a Marked red or green fabric print t2 1/2″ square with one end of a cream fabric print 2 1/2″ by 4 1/2″ rectangle. Note the placement of the mark diagonal line.
- Stitch on the mark line; trim away the excess fabric, leaving a 1/4″ seam allowance. Press your attached triangle open when finished.
- Align a matching marked red or green fabric print 2 1/2″ square with the opposite end of the cream fabric print rectangle. Note the placement of the mark diagonal line in the diagram.
- Stitch on the marked line; trim and press as before to make a flying geese unit A. The piece flying geese Unit a should still measure 2 1/2″ by 4 1/2″ after being sewn.
- Repeat steps 3-5 to make a total of 4 of the flying geese unit A.
- Repeat steps two and three using the remaining marked red or green fabric 2 1/2 inch squares and four dark red fabric print 2 1/2 by 4 1/2″ rectangles to make for a flying geese Unit B.
- Referring to the diagram for placement, sew together one flying geese Unit a and one flying geese Unit B to make a star Point unit. One Direction. The p-star Point Unit should measure four and a half inch square. You will need a total of four star Point units
- Align a Marked dark red fabric print two and a half inch square with one corner of a cream print four and a half inch square. I’ve included the diagram. Make sure and know the placement of the mark diagonal line.
- Stitch on the marked line; leaving a quarter inch seam allowance.
- Press the attached triangle open to make a corner unit. The piece corner unit should still measure 41/2 in square after sewn. You will want to repeat to make a total of four corner units for your full size quilt pattern
- Referring to diagram for, lay out the four star Point units, the four corner units, and one assorted red or green four and a half inch square and three horizontal rows. Sew together the units in each row. Press the seam allowances towards the Center Square or Corner units.
- Now, join the rows to make a star block. Don’t forget to press the seams allowances in One Direction. Your piece star block should measure 12 and 1/2 in square after it is sewn.
Assemble the sashing units
Referring to diagram 5, sew red floral fabric sashing triangles to opposite edges of a solid green a piece to make a triangle unit. You will want to press the seam allowances towards the a piece
Repeat to make a second triangle unit and then join the triangle units to the long edges of the solid red V piece to make a sashing unit a. Your piece the fashion unit Asian measure four and a half inch square when finished sewing repeat this process to make a total of nine units a.
Referring to diagram 6, so red floral sashing triangles to opposite edges of the solid red a piece to make a triangle unit. Press your seam allowances towards your a piece. Go ahead and repeat to make a second triangle unit.
Next, join the triangle units to belong edges of a solid green bee piece to make a sashing unit B. You will want to repeat this process unit B pieces.
Referring to diagram 7, so red floral fabric sashing triangles to the opposite edges of a solid red a piece to make a fashion Unit C. Make sure and press your seam allowances towards the A piece. You need to repeat this process until you have a total of 14 sashing Unit C.
Assemble the sashing strips
Referring to diagram 8, sew together a solid green one and a half by 42 in strip, a red floral fabric two and a half by 42-in strip, and a solid red one and a half by 42 in ship to make a strip set.
Make sure that you press your seam allowances in the same direction. You want to repeat this process until you have a total of 16 strip sets.
Cut your strip sets into 12 and 1/2 in wide segments to make a total of 48 piece 4 1/2″ by 12 1/2″ sashing strips.
Assemble the quilt Center
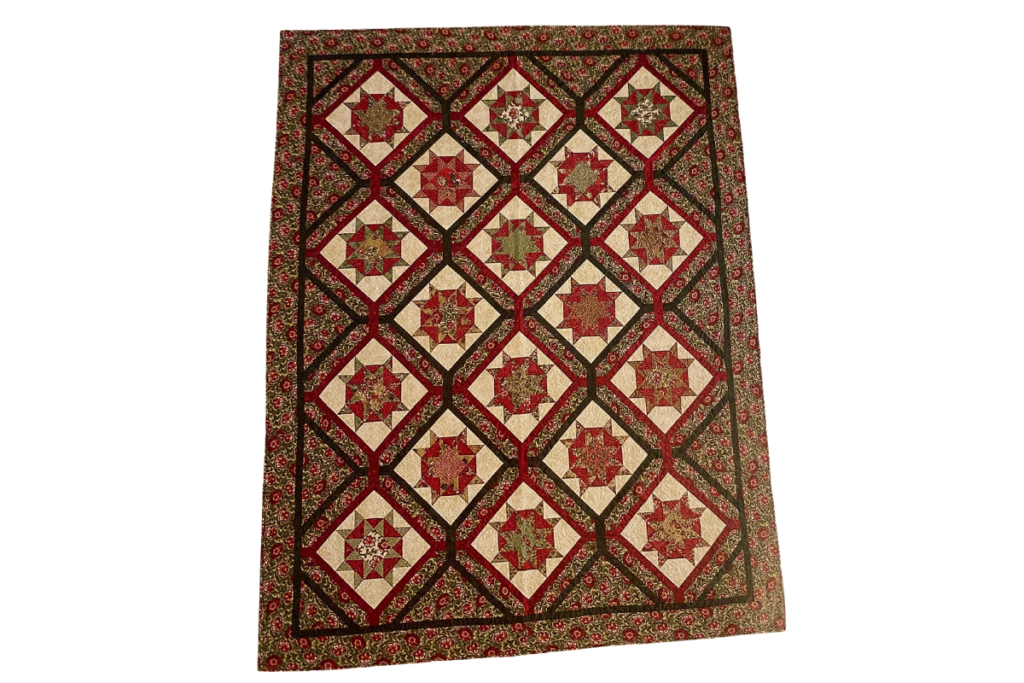
Referring to the photograph above replacement, lay out the 18 blocks, the 31 piece sashing units the 48 piece sashing strips, and the 10 red floral fabric setting triangles and diagonal rows.
Sew together the pieces in each row. Press your seam allowances towards your sashing strips.
Go ahead and join your rows. Press your seam allowances towards the sashing rows.
Add the four red floral fabric Corner triangles to complete the quilt Center. The pieced quilt Center should measure 67 x 89 5/8″ in after you sew it.
PS you’re nearly finished with your full size quilt pattern.
Add Your borders
Cut and piece the remaining solid green 1 1/2″ x 42″ strips to make the following:
- 2- 1 12/ x 89 1/2″ inner border strips
- 2- 1 1/2 x 69″ inner border strips.
Sew the long inner border strips to the side edges of the pieced quilt Center.
Next, you will add the short and a border strips to the top and bottom edges of the piece quilt Center. After you’ve sewn it pressed your seam allowances towards the solid green inner border
Cut and piece the red floral 5×42″ strips to make the following:
- 2-5×91 5/8 ” outer border strips
- 2- 5 x78″ outer border strips
Sew the long outer border strips to the side edges of the piece quilt Center. Go ahead and add the short outer border strips to the top and bottom edges of your piece quilt Center to complete the quilt top. Don’t forget to press your seam allowances towards the floral outer border
Finish your quilt
Layer your quilt top, batting, and backing and quilt as desired. This quilt is probably easier to finish on a long arm. If you have a large throat quilt sewing machine, you can probably do it on that.
Once you finish that, go ahead and place your binding on your full size quilt pattern. I would love to see what you’ve created. You can send me a message on Facebook or send me an email.