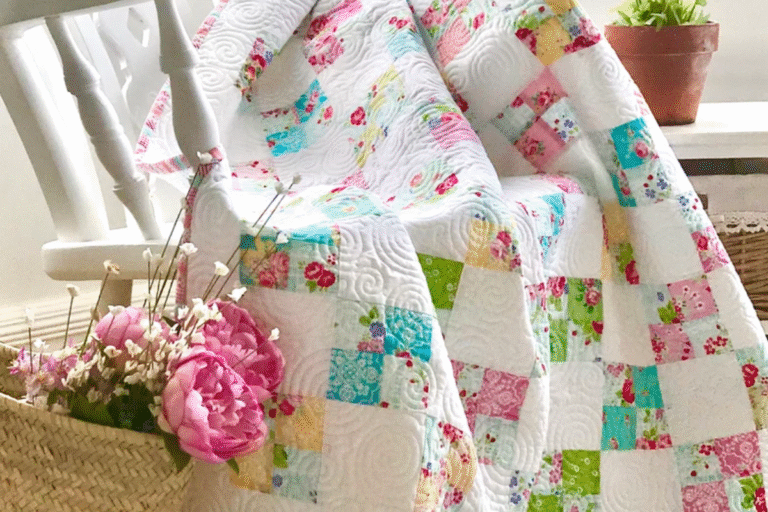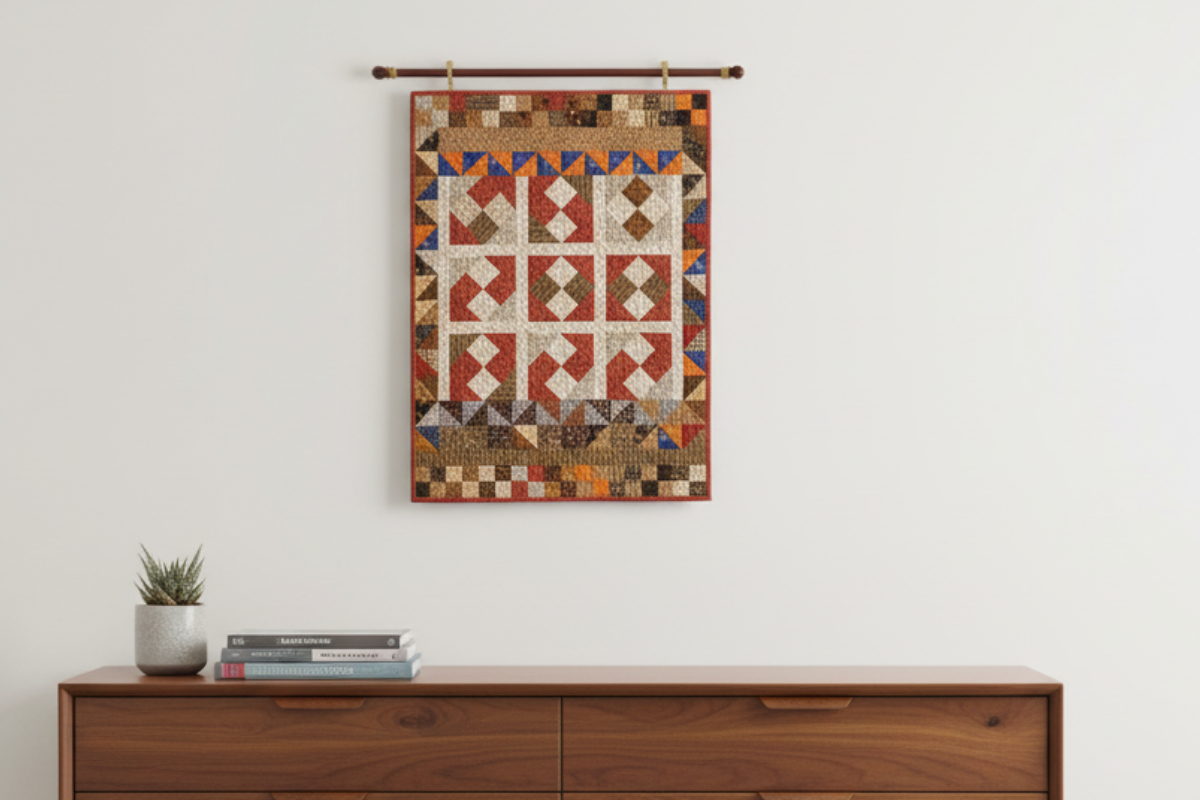
Four Patch Fun Quilt Pattern
This four patch fun quilt pattern is a great weekend quilt project. If you have a stash of scrap fabrics, grab those first to use to make this quilt.
Fabric Giveaway
Each month I give away fabric. You simply answer the question I ask in email to be entered
Table of Contents
Free Quilt App
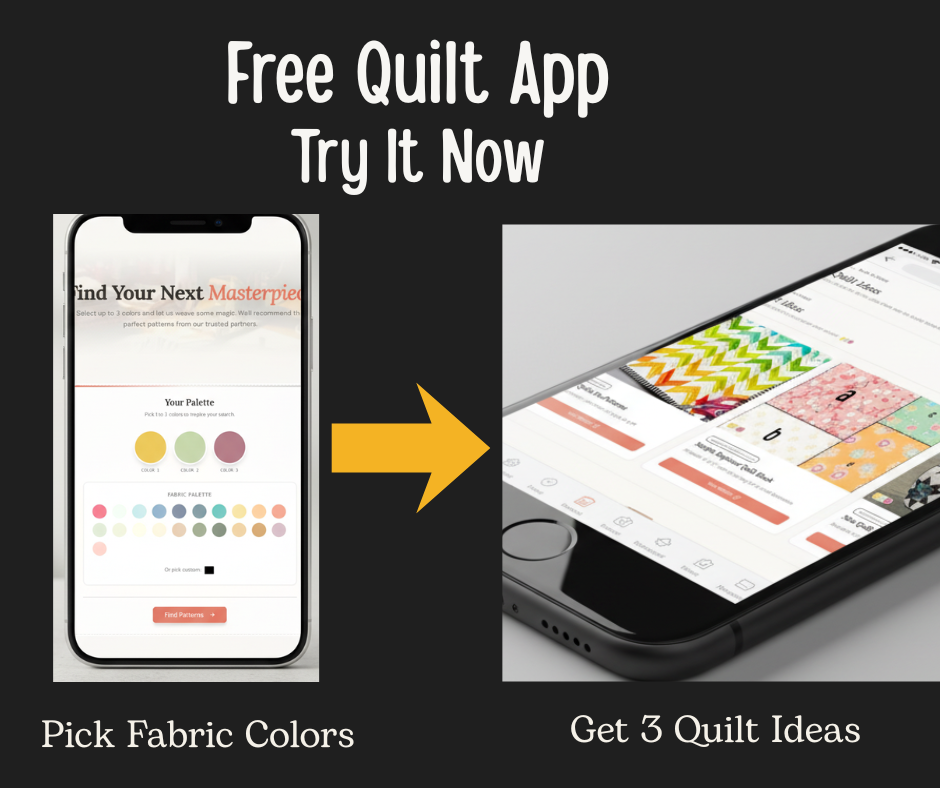
You can stop scrolling trying to find the perfect quilt pattern for the fabric you have on hand. Simply pick up to 3 fabrics and you will receive 3 quilt ideas
Fabrics Needed:

This small quilt measures 18 1/2 x 25″. It’s perfect for hanging over a dresser or over a crib and could be used with a small child. They will outgrow it quickly.
- 1/2 Yard TOTAL of assorted Red, blue, dark brown, black, cream and orange prints for blocks and borders.
- 3/8 yard of red print for blocks, borers and binding
- 1/ yard of orange print for borders
- 1/8 yard blue print for borders
- 1 fat quarter of cream solid for block and sashing
- A scrap of cream striped fabric 5×5″ for 1 block
- 1/8 yard of light fabric for blocks
- 1/8 yard of light brown print for top border
- 1/8 yard of brown stripe for bottom border
- 2/3 yard of fabric for backing
- 23″ x 29″ piece of quilting batting
Cut Your Fabrics
From the cream solid cut:
- 16 squares- 1 7/8 x 1 7/8″
- 6 strips: 1 1/4″ x 4 1/2″
- 4 strips 1 1/4″ x 14″
From Assorted dark brown fabrics, cut:
- 7 squares 1 7/8″ x 1 7/8″
- 2 Squares, 3″ x 3″; cut in half diagonally to make 4 triangles
From the Red fabric cut:
- 11 squares 1 7/8″ x 1 7/8″
- 10 squares: 3″ x3″; cut in half diagonally to yield 20 triangles
- 3 strips 1 1/2″ x 42″
From the Cream stripe cut:
- 2 squares 1 7/8″ x 1 7/8″
From the light fabric cut:
- 6 squares, 3″ x 3″‘ cut in half diagonally to yield 12 triangles
From each of the orange and light blue fabrics cut:
- 7 squares 2 1/2″ 2 1/2″ (14 total)
From the assorted fabrics cut:
- 72 squares 1 1/2″ x 1 1/2″
- 42 squares 2 1/2″ x 2 1/2″
From the Light Brown Print cut:
- 1 strip 2″ x 15 1/2″
From the brown striped fabric cut:
- 1 strip 1 1/2″ x 18 1/2″
Making Your Quilt Center
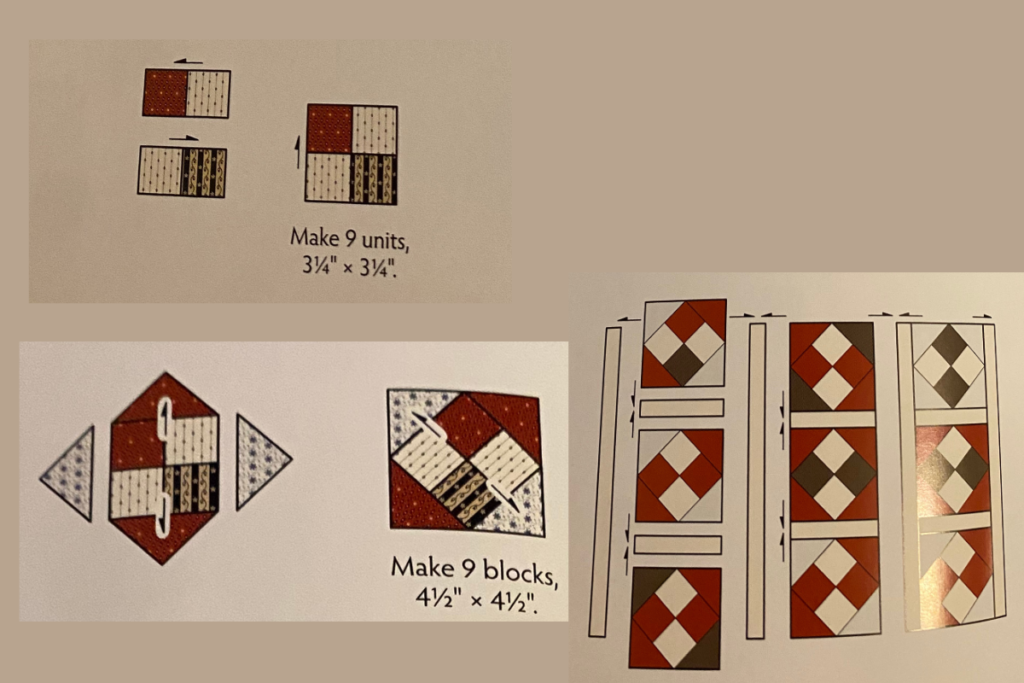
- Lay out 2 cream solid and two red or dark brow 1 7/8″ squares in two rows of two. Sew the squares into rows using a 1/4″ seam allowance. Press your seams as seen in the upper left picture.
- Join the rows to make a four patch unit measuring 3 1/4″ squares
- Make 9 four-patch units
- Referring to the bottom left photo sew one red, brown or light print triangle to the top and one to the bottom of a four-patch unit.
- Add triangles to the remaining sides of the unit to complete an on-point four patch block. Trim the block to 4 1/2″ square including your seam allowance. Make nine blocks. This is a huge part of your four patch fun quilt pattern.
- Lay out the nine on-point four patch block, six cream solid 1 1/4″ x 4 1/2″ strips, and four cream solid 1 1/4″ x 14″ strips to form vertical columns.
- Join the blocks to the 4 1/2″ sashing strips to make three columns.
- Join your columns of your four patch fun quilt pattern to the 14″ sashing strips to complete your quilt center. Make sure the sashing strips align across your vertical sashing strips.
- Your quilt center should measures 15 1/2″ x 14″.
Create Your Quilt Borders for your Four Patch Fun Quilt Pattern
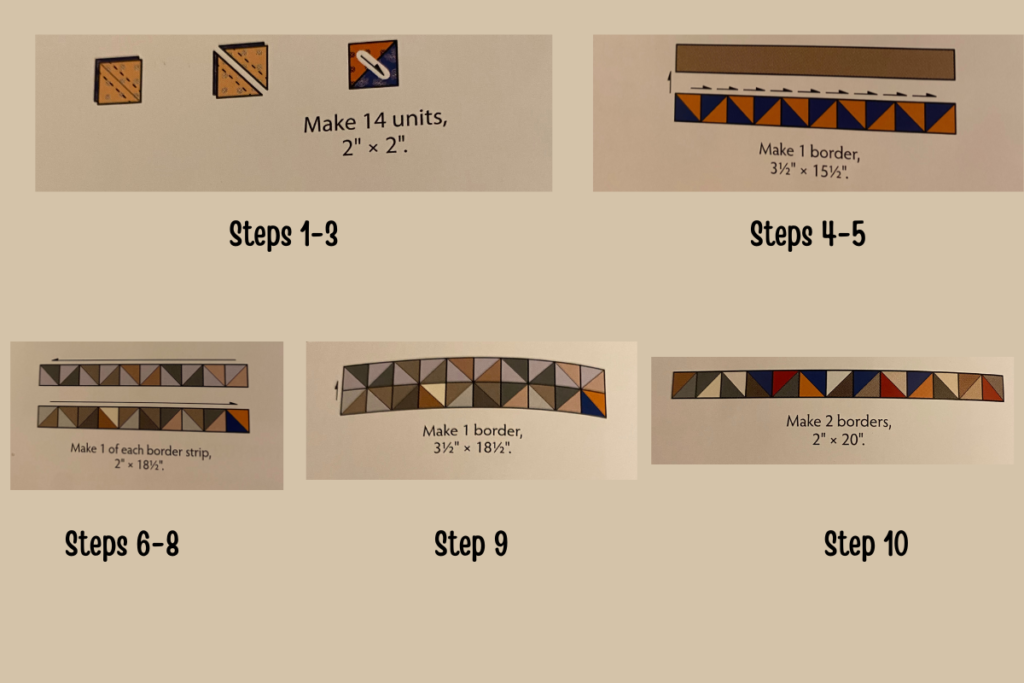
- Draw a diagonal line from corner to corner on the wrong side of your orange two and a half inch square.
- Layer it on top of a blue two and a half inch square right sides together. So a 1/4″ from both sides of the drawn line. Cut on the line to yield two half square triangle units.
- Trim the units to 2 inch square. You want to make 14 units. 10 for the orange blue border and four for the remaining half square triangle borders.
- Sew 10 orange blue half square triangle units together to make a strip that measures 2 in by 15 and 1/2 in.
- Join the light brown to inch by 15 and 1/2 in strip to the top to make a border that measures three and a half inches by 15 and 1/2 in.
- Use the remaining print 2 1/2″ squares to make 42 additional half square triangle units.
- Join 10 blue fabric half square triangle units to make a piece Border strip that measures 2 in by 18 1/2 inches.
- Repeat sewing assorted half square triangle units together to make another 10 units Border strip
- Join the strips from Step 4 to make a broken dishes border that measures 3 and 1/2 in by 181/2 in
- So 13 assorted half square triangle units together to make a side border that measures 2 inches by 17 inches. Repeat this process to make a second side border
- Select four Fabrics 1 1/2″ squares either two matching pairs are all different and lay them out in a four patch Arrangement. Sew the squares into rows. Join the rose to make a four patch block that measures 2 1/2″ square. You need 18 of these blocks.
- Sew together nine assorted four patch blocks to make a 2 1/2″ by 18 1/2″ piece border. Repeat for a second for patch border.
- So the brown stripe 1 1/2″ by 18 and 1/2 in strip to the top of one four patch border. Take a breath, you’re about finished with your four patch fun quilt pattern.
Add your borders
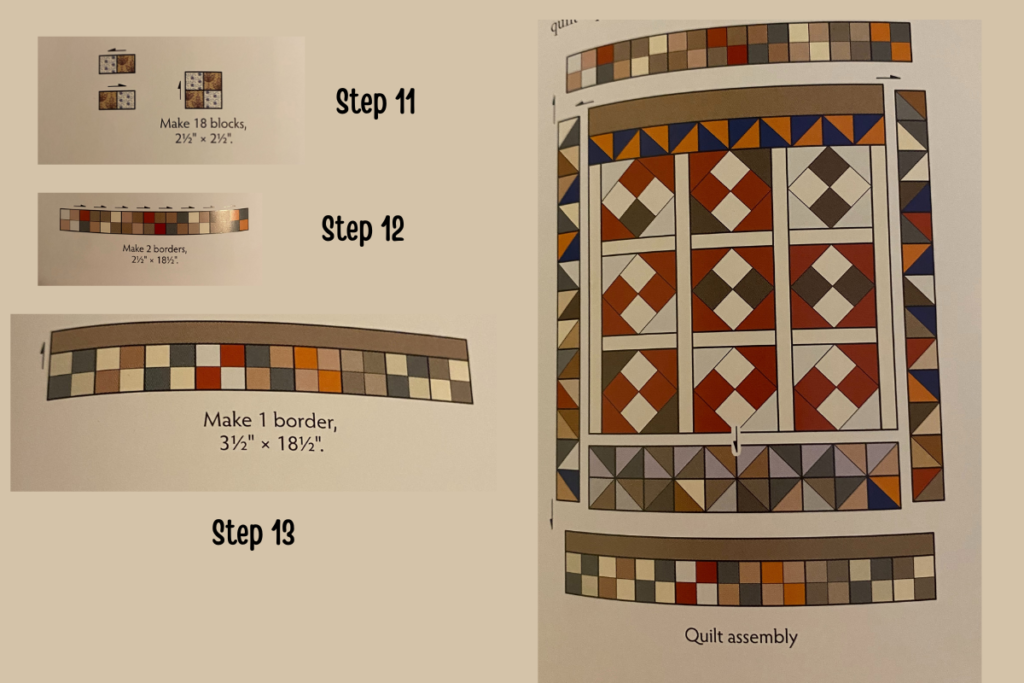
1. Referring to the quilt assembly diagram above, join the orange blue border to the top of your quilt Center.
2. Sew the broken dishes border to the bottom of the quilt Center, and then add a half square triangle border to each side of your quilt Center.
3. Finally, add the four patch borders to the top and bottom, as you can see above. Your completed quilt-top should measure 18 and 1/2 in by 25 in.
Finish your quilt
You can either quilt it by hand or machine. Your four patch fun quilt pattern is now finished. Using the red fabric, 1 1/2″ wide strips make an attached your single fold binding. If you’re giving this as a gift, it’s really fun to add a label showing who it was made by.
If you love this small quilt check out these Mini Quilts